Hi y’all! Folks wanted me to explain how I draw mouths, so here it is! Nothing super complicated, just a really quick and simple demonstration. Another quick note I’d like to add- I’ve always been taught that you should never learn to draw features outside of the face. For example – A lot of young artists will recognize that they need to practice drawing eyes, but then after hours/days/weeks of practicing they find themselves unable to work all this new drawing ability into an actual face. Same thing goes for mouths/noses/brows etc. Get the bulk of the work out of the way on the first attempt! Draw the whole lower half of the face!
Just a quick thing I put together. This blew my fucking MIND when my anatomy teacher pointed it out. My drawings instantly got better. You might know it (good for you, I wish I knew it before too T_T) or you might not and it might help you get better.
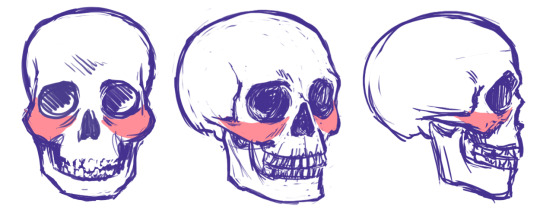
I’ve found that drawing the head starts to make a lot more sense once you start thinking about cheekbones and cheeks, and how the fit into the head structure.
You might be aware of the Mysterious Indent that Looks Good Next to the Outer Part of the Eye, or the Mystery Indent for short.
Drawing a Mystery Indent may serve you fine if you only draw the head from flat angles, but it falls apart when you get adventurous.
Why isn’t this making sense anymore?
Drawing a ‘Mystery Indent’ is an attempt to imply cheekbones without knowing how they actually incorporate into the skull, and this is why it looks so unconvincing when you use it to draw the head in anything other than ¾ view.
The cheekbones wrap around the head and eye sockets from above the bridge of the nose. The concave you draw if you draw the ‘Mystery Indent’ is a misunderstanding. There is no concave. You should instead be thinking of this as where the eye socket/brow overlaps the (convex!) cheekbone.
Compare the cheekbones on both sides for placement. They should match up and correspond with each other.
(Knowing cheekbone structure helps when drawing gaunt characters, because their cheekbones may stick out. Remember to compare the cheekbone placement on both sides!)
* This is part of a much larger tutorial I’m working on about head, face, and facial feature structure. Hopefully more to come eventually?
The external oblique is that muscle that covers the side of the torso (partly on the front and on the sides of the body).
It’s formed by 8 portions per side, each one attached to a rib: the upper fours – thoracic portion – can be seen as four fleshy stripes in hot males muscular figures, while the bottom fours – flankpad portion – are usually perceived as a one thick bulbous shape. The waist stays at the conjunction between thoracic and flankpad portion.
This muscle actually covers the frontal abs too with a super thin kind-of-like cartilaginous surface. Under the flankpads, a ligament goes from the ASIS of the hips down to the front of the pubic bone, with a thicker line that forms a rather visible “V” shape. On women, this fold of the groin is rather curved, while on men is more angular and since it’s extremely sexy, is also called Apollo’s belt (or Adonis’, if you prefer ^^).
The external oblique muscle helps you move your upper body, of course. With the help of other muscles, it lets you flex the vertebral column and bend at the waist to the front; it also assists in lateral flexion (see Cullen stretching down here), or to rotate your torso on the horizontal axis, so with your feet facing forward and your upper body facing sideways (like Ellyna). The muscle’s shape stretches or compresses when doing these movements, of course, so remember it when drawing certain poses. One more thing to notice in Ellyna’s pose is a “tension line” (force?) that goes from the muscles of the neck, through the strenum and down to the pubic bone, and helps describing this twisting movement.
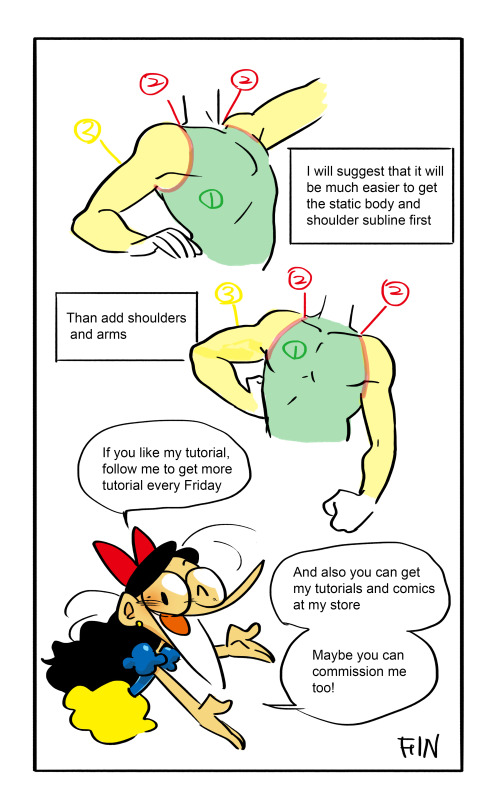
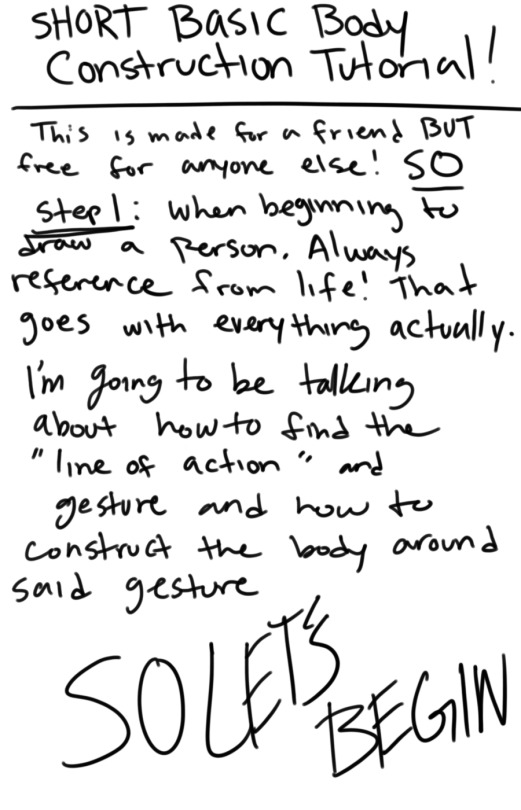
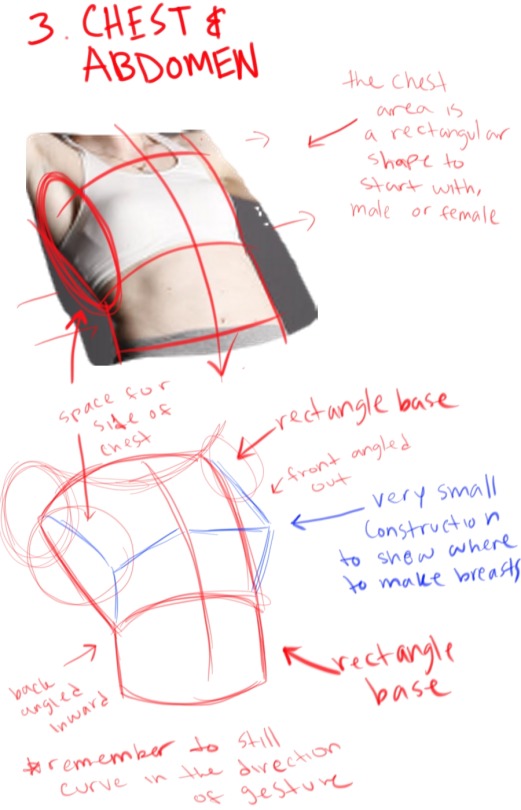
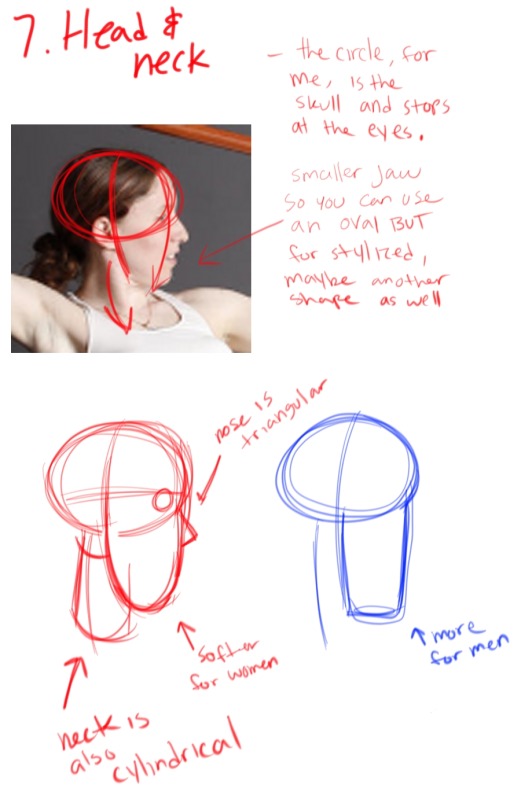
I made this tutorial for a friend who needed some advice but if it helps anyone else, free free to use!
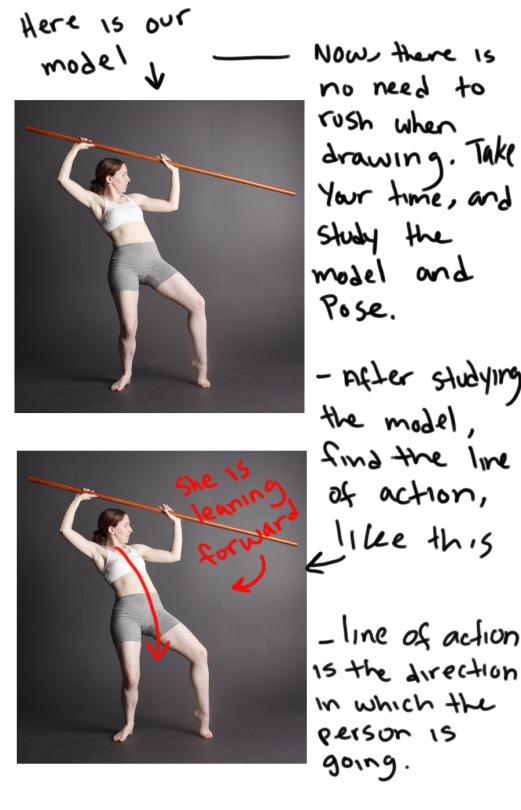
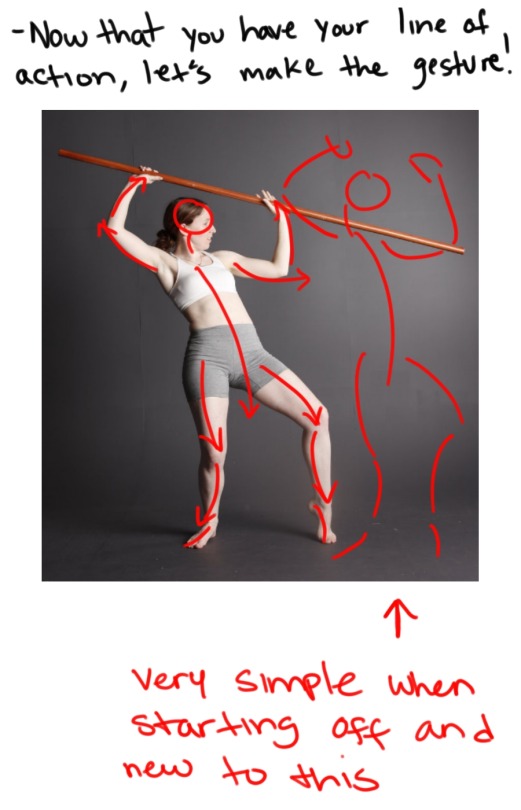
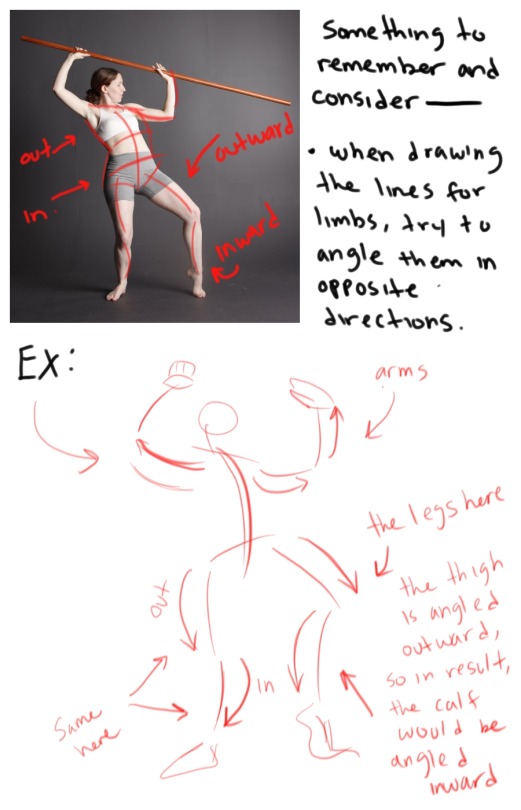
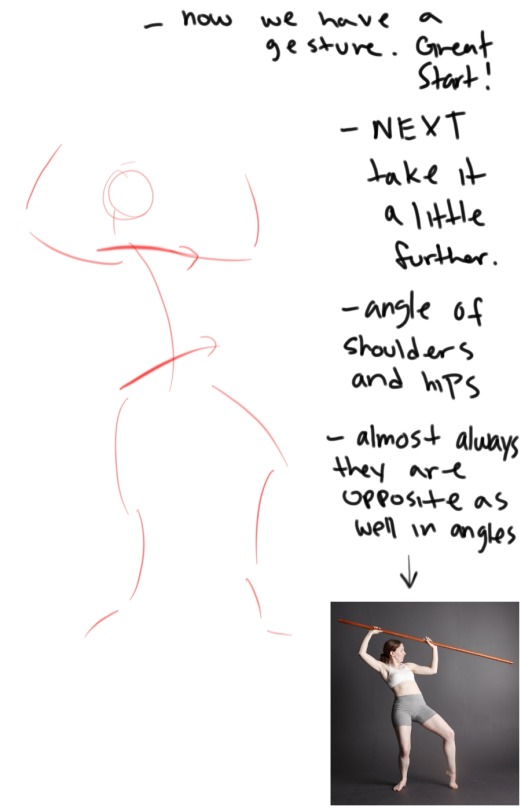
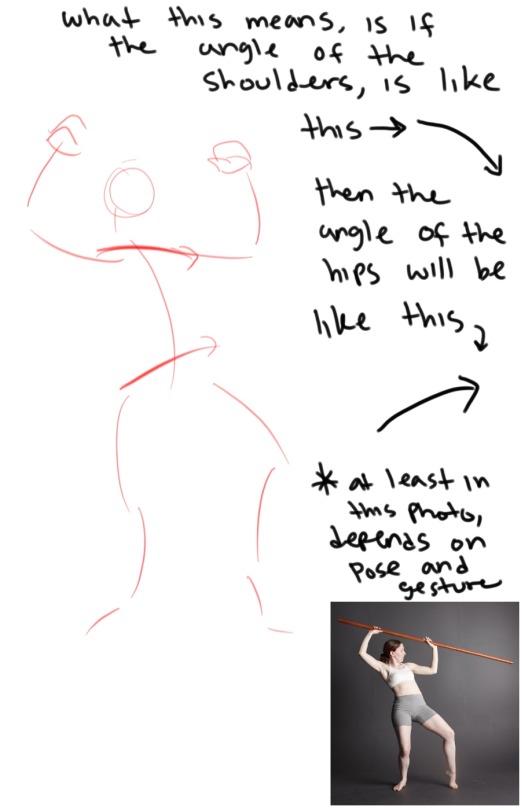
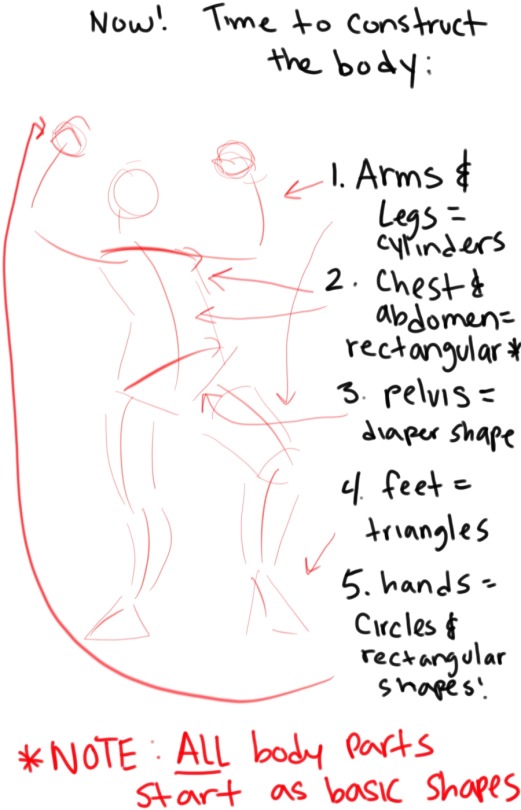
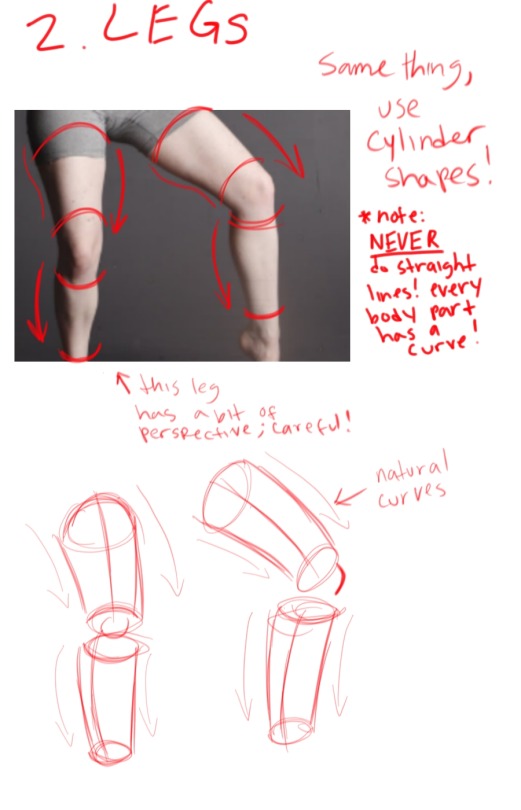
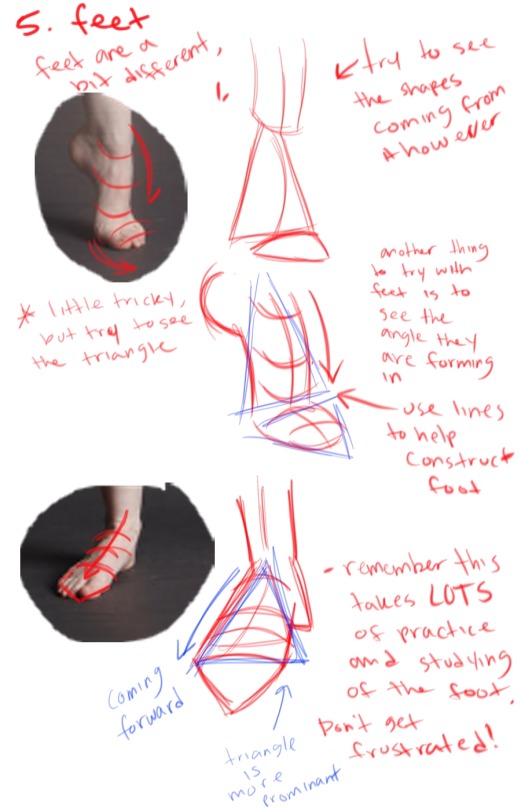
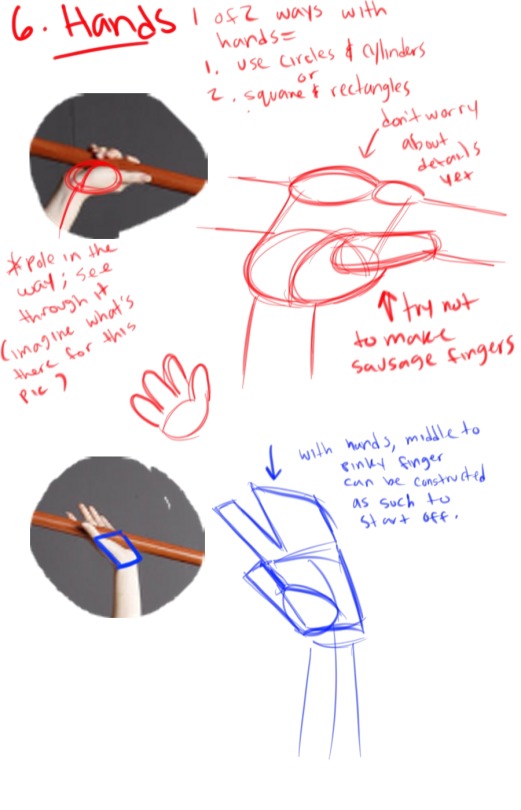
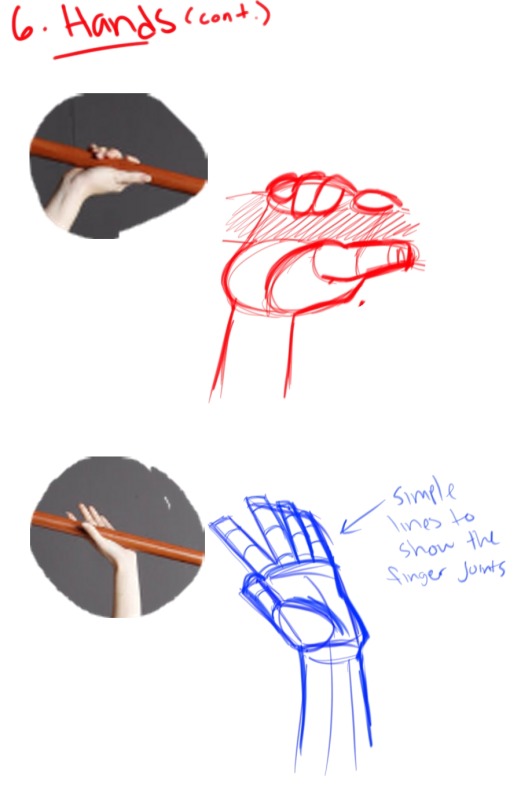
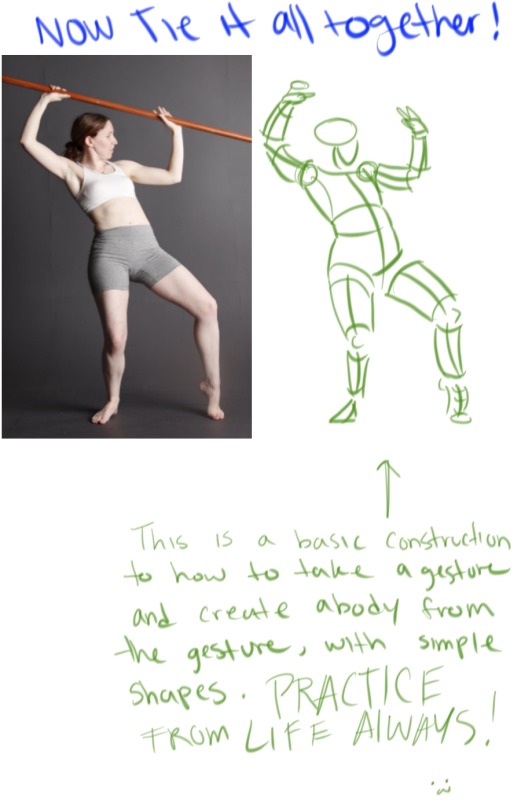
This is for basic body construction, try it from life drawing or from a website that have these life drawing poses! Remember, don’t rush the process and don’t feel frustrated when it isn’t perfect, it takes lots of practice!