It took me years to figure out how to use Photoshop to make watercolors look good! But fortunately, there’s one little thing that you can do it, without even adding a second layer.
(I have Photoshop CC but this will probably work similarly on others too.)
So here’s what the watercolor scan originally looked like. Blah so grey and gross and the colors are all wrong.
It’s like…okay? But not compared to the original. So I opened up the Camera Raw Filter. It’s the fourth option available on the menu shown below.
Here’s what it looks like after making adjustments on the first screen (image below). Already a huge improvement! I’ve included what my adjustments are so you can see the gist of what I adjust and what I don’t. Each scanner will be a bit different, so use your eye and keep comparing the digital image to the original!
On this stage, don’t worry about the colors being right. If the oranges are less orange than you want, for instance, we’ll fix that in a minute.
So now I went into the HSL/Grayscale menu, to Hue. Here are the adjustments I made with this one!
The Hue menu adjust the tone of each color. So if you want your purples to appear more blue-ish, or your oranges to be more red and less yellow, use the Hue menu!
On the same HSL menu, I clicked the tab for saturation.
This tab basically just makes it more greyscale or more saturated (vibrant) or a color! The adjustments I made are shown below:
And finally click the luminance tab!
This basically lightens or darkens each color. So if you notice the reds on your piece, for instance, are too light–use this to darken them.
Simply press apply and then you’re done! Here are the differences between the original and the edited. The colors are pretty much exactly how they look in person!
So basically, it’s just this:
Scan–> Camera Raw Filter–> Adjust things on the first screen–> Go to HSL tab (fourth one)–> Adjust Hue–> Adjust Saturation–> Adjust Luminance–> Click Okay!
Have fun with this! Feel free to send us an ask, or at us, if you want feedback or have questions! Also, if you notice this adjustment white washes darker skin (it did in this) just go back in with a layer mask or multiply layer!
Ever created a drawing you really love, then decided that you wanted to paint it in watercolor (or transfer it to another type of paper)?
Or, are you super frustrated with getting smudges and eraser marks on your crisp expensive nice paper.
Maybe you have a digital sketch you like, but you want to turn it into a traditional painting.
This is a tutorial to solve all of this.
Start with a sketch on plain cheap copy or sketch paper, then transfer it over like this:
First, take your sketch paper and un-attach it from your sketchbook, or print it to size if it’s digital.
Next, flip the paper over and put it on top of a light box, or against a window (so you can see through it). Take a graphite pencil and roughly trace the entire thing on the back. I’d recommend using HB graphite and a non-mechanical pencil.
At the end, it should look something like this.
Here is an example of what both sides look like, with a corner peeled over:
Now, attach it to your nice paper. Use tape on two corners (so it stays in place, but you can peel up some corners to check it).
Tips for easily released tape: Cut the tape to your desired length and put it on fabric, like your pants, and pull it off. Repeat a few times. The oils from your fingers plus the fibers will make it less sticky!
Here is it unattached, printed original sketch side up (not the graphite colored side):
See how the tape looks messy in the bottom photo? That’s what you want!
Now, trace the original side of your sketch with a ball point pen! You need a very sharp tip and to be able to see where you’ve drawn, so definitely use a ball point pen for this.
Use firm pressure!! (Your hand will probably be sore if you do this all at once). Make sure you’re on a hard surface, too.
Make a copy of your original sketch and use that to transfer, if you don’t want to ruin the original drawing.
And, when you complete the whole thing, you’ll have a light but visible transfer! Perfect for painting over. Here’s a sneak peek when I lifted a corner!
This is honestly a very loose, general rule of thumb when you’re considering how to put together a drawing – take everything I’ve said with a grain of salt (and a dash of your own experience), because composition and flow is super subjective
this is just some shared personal tips based on my own learning – but I hope it helps anybody who might be struggling n_n
Firstly, thank you for your interest! I will give a walkthrough of this piece here!
As a short disclaimers, I just want to say that this is my way of doing it, and there are many other ways different artists may make works as well, and all ways are correct! I’m just showing you how I do it!
Secondly, I’m specifically talking about photoshop CC, which is the program I am using. The concept itself is the same, but how to implement these features may vary program to program.
Lastly, I still consider myself sort of a beginner, as I have not done transparency arts for that long, and I still have a lot to learn, so take these tips and walkthrough with a pinch of salt!
When deciding what to make, I wanted to go with the concept of a background inside someone, and the idea of the ocean and Lance hearing it through a shell kind of came to me.
I first started with the lineart of Lance! It was initially drawn on white:
Then, I made a pure black background layer on top of the white background layer. That would be to see the white! Following that, I solid colored lance with pure white. It’s helpful to make the background color semi transparent so you can see both the black lineart and white.
The use of layer masks was key to making these kinds of transparency works. They allow shades from black to white to be drawn ‘normally’ on the mask and translate them into levels of opacity!
In this image, for demonstration, I made a bunch of rectangles on a mask layer over the plain white layer. The rectangles were drawn with different shades, but because they were on a layer mask, that translated those shades to opacities. White = completely solid Black = completely transparent
Using layer mask, I made the gradient for the ocean.
The next was drawing the ocean and sky. I made these with pure white at different opacities. I tended to alter the opacity of the brush a lot to achieve the different variations of white. These were done on many white layers on top of one another.
I continued doing this and layering whites on top of one another until it resembled an ocean, then went back to the original white layer and added shadows using layer masks again! I repeated switching between layer masks and drawing on top with white these until they look satisfactory!
I also used the voltron symbol and colored it pure white and added it in! Along with stars and other sources of light! I used a blurry brush with a low opacity for the ‘glow’ around the clouds and the icon!
Lastly, I opened Lance’s eyes! They were ‘drawn’ just by erasing the bottom white layer with the pencil tool I used for the lineart, but they could have also theoretically been done using layer masks too.
And he is done!
Important: When saving the image, ensure you are saving it in a format that preserves opacity! For example, in photoshop I save it as a .png file! Make sure that you get rid of the background so you are left with nothing there!
On photoshop it looks like this:
I hope this was helpful! Depending on the type of art, the techniques used in transparency works may vary! Sometimes I use mostly just solid erasing rather than layer masks, other times, like this, I use a lot of masks and layers. Often if you are doing works with gradients, varying levels of grey, shade and smaller details, masks are better, while for the type of “disappearing/changing” parts of linearts, erasing is better. This is only one way of doing it – the potential in this kind of art is endless!
I hope this reads okay, and if you have any other questions, you can always message me! If you got through this long walkthrough, thank you very much for reading!
If you are interested in seeing more transparency works, I made a blog dedicated to them @transparent-art and if you make transparency works, show me, I’d love to see them! (I love this type of art so much!) Have fun experimenting!
What a cool tutorial! I love this idea, very unique and well done.
For artists who have problems with perspective (furniture etc.) in indoor scenes like me – there’s an online programm called roomsketcher where you can design a house/roon and snap pictures of it using different perspectives.
It’s got an almost endless range of furniture, doors, windows, stairs etc and is easy to use. In addition to that, you don’t have to install anything and if you create an account (which is free) you can save and return to your houses.
Examples (all done by me):
Here’s an example for how you can use it
Great find, thanks!
OMG HEAVEN!!
Bless you!!!!
@destatree we can finally design the boys apartment!!!!!
it’s such a simple yet hard concept to grasp, right? i’m having loads of trouble starting since there’s no exact tutorial for it, so you’ve gotta broaden your search for the topic.
recommendations:
i recommend watching speedpaints to get a better understanding on how other artists do it
the color study tag on here has loads of pics to take inspiration from
this book called ‘color and light’ by james gurney i’m borrowing from a coworker has tons of stuff that goes deep within the understanding of color (it’s a LOT to take in, i’ve had this for 3 weeks and i still haven’t finished it)
i have a pretty basic understanding on choosing colors so i usually eyeball it instead from reference photos. but if you’re a beginner you need someplace to start, picking colors off the pics would be good, but don’t rely on it too much. it often leaves your drawings pretty bland since you’re straight up copying from the camera lens.
2) keep things quick and simple
you’re doing a color study, not an environmental study. i’m having trouble with over detailing my pieces but i’m making a conscious effort to stop caring since the main focus here is the colors, their relationship with the surrounding (even the sky has fricking layers i need to properly understand)
3) pick a picture that inspires you!
i usually pick out photos who has a clear contrast on stuff, so you’d wanna work on something that really attracts your eyes. google is a friend, don’t forget that. it’s better to reference of real life photos than fanart, and plus movie still/screencaps are a good place to see how the colors work out together
4) study your fave artist pieces
pick a piece you like the most and study it. what makes it attractive to you? why does this shade of pink go well with this sort of blue? you can color pick the piece and study their pattern in picking colors, some artists are using the same sort of color palette and it makes them stand out. try to find out why and experiment that method on your pieces of artwork.
so these are the only things that i have on my plate right now, and i still have a loooong way to go, lol. hope it helps!
Thank you to the Patrons who voted for this Tutorial! If you would like some bases to use freely for exercising your new knowledge, you can download them HERE.
If you would like to check out my reference Pile that I used for this tutorial, check that out HERE!
Hope this helped somehow in your journey to drawing plump and fat and chub folks c:
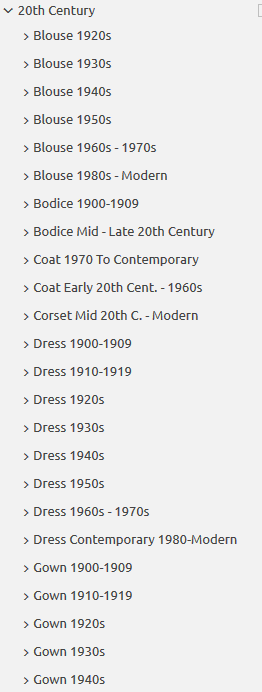
Do you design a lot of characters living in not-modern eras and you’re tired of combing through google for the perfect outfit references? Well I got good news for you kiddo, this website has you covered! Originally @modmad made a post about it, but her link stopped working and I managed to fix it, so here’s a new post. Basically, this is a costume rental website for plays and stage shows and what not, they have outfits for several different decades from medieval to the 1980s. LOOK AT THIS SELECTION:
OPEN ANY CATEGORY AND OH LORDY–
There’s a lot of really specific stuff in here, I design a lot of 1930s characters for my ask blog and with more chapters on the way for the game it belongs to I’m gonna be designing more, and this website is going to be an invaluable reference. I hope this can be useful to my other fellow artists as well! 🙂